11/17/25

What Factors Affect CMM Accuracy and Precision?
A single micron out of place can alter a product’s fit, function, or compliance. In precision-driven industries, this level of accuracy means everything.
Coordinate Measuring Machines (CMMs) stand at the heart of quality assurance by delivering precise data that influences both workflow and reputation. Yet, hardware doesn’t solely shape measurement integrity. Real confidence comes from understanding every detail within the measurement chain—including the factors that affect CMM accuracy and precision.
Styli and Probing Strategy
The stylus is a central element in any CMM measurement. Your selection and how you use it affect the quality and repeatability of results.
Stylus Selection: Material, Length, and Stiffness
The ideal stylus resists flex and maintains its spherical shape during contact, but in practice, all styli exhibit some deflection. Using the shortest possible stylus for a feature helps reduce error, while shaft materials like carbon fiber or ceramic offer greater stiffness than steel.
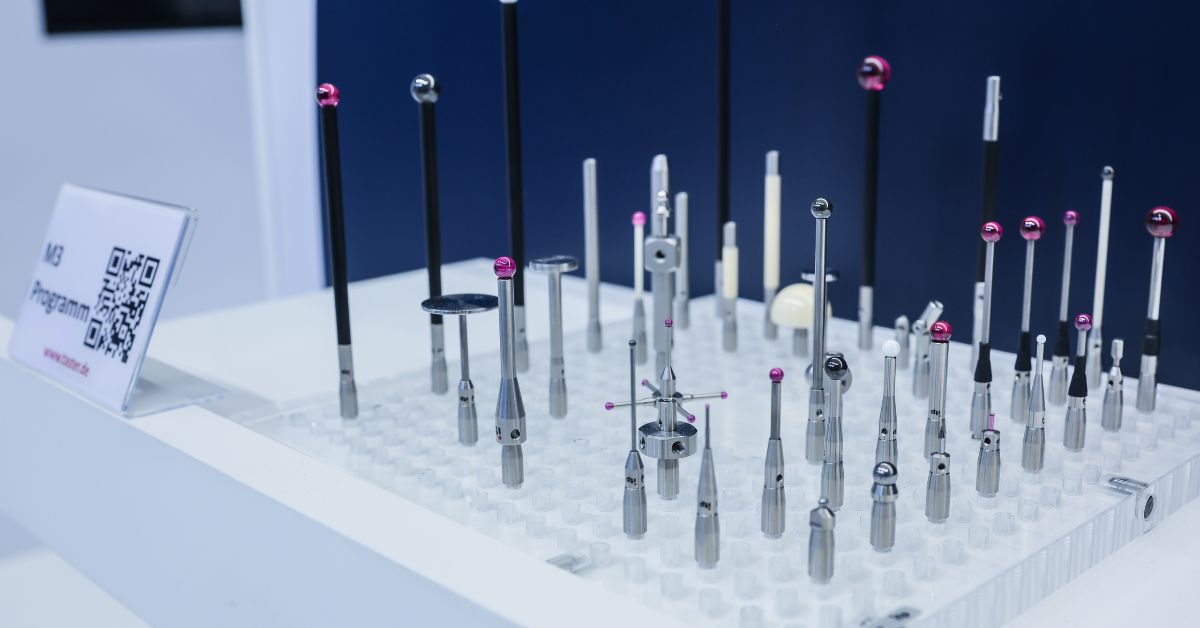
The CMM stylus probes you select should meet the application's requirements for access and minimize deflection. If your application requires frequent stylus changes, consider establishing a workflow for qualifying multiple styli in a rack, documenting calibration sequence, and scheduling re-qualification.
Tip Condition, Build-up, and Probing Force
A stylus tip, typically made of ruby or silicon nitride, can develop wear or pick up residue from parts. Microscopic build-up or wear to the ball surface distorts every measurement until you clean or replace the tip.
You must tailor probing force and pre-travel settings to each stylus. Misapplied settings systematically shift measured points. Regular tip maintenance is critical, especially when introducing new parts with unknown surface states.
Probing Strategy and Cosine Error
Measurement outcomes rely on both physical contact and the approach strategy. Selecting optimal approach vectors reduces cosine error, while verifying sufficient point density fully describes features. Focus on developing probing routines that optimize physical interaction with the part.

Fixturing, Part Preparation, and Datum Strategies
How a part is fixtured and referenced is as crucial as the metrology hardware itself.
Rigidity and Datum Scheme Selection
Fixtures must support the part without distorting its form. This is especially critical for thin-walled or compliant components. Rigid but not excessive clamping is essential for stability.
Choosing datums that are stable during repeated setups improves reproducibility. Develop a datum scheme that routinely runs repeat-measure checks to confirm that the locating datum remains stable under different operator setups.
Cleanliness and Surface State
Surface films, residues, and burrs all appear in measurement data. Prior to measurement, thoroughly clean parts with a suitable solvent and check for burrs, especially along machined edges.
If you’re bringing parts from a different temperature zone, confirm they have acclimated to the environment. For critical geometries, consider a final wipe and a visual verification with magnification.
Software Parameters and Measurement Methodology
CMM measurement software is a powerful tool, and its configuration matters.
Alignment, Compensation, and Uncertainty
Align the part to the CMM coordinate frame using a robust feature selection. Settings such as temperature compensation, stylus qualification, and volumetric error mapping should be actively managed.
Data Handling: Point Density, Filtering, and Speed
Choose an appropriate number of data points for each feature. Too few reduces fidelity, but too many may overwhelm the software or introduce unnecessary complexity. Be cautious with filtering: aggressive smoothing may mask true surface variation.
Uncertainty Budgets and Reporting
A well-structured measurement process considers not just the immediate result, but the confidence in that result. Documenting and understanding measurement uncertainty is essential for CMM users in regulated industries, advanced manufacturing, and any application subject to audit.
Type A and Type B Uncertainty Contributors
Type A uncertainty contributors come from statistical variation in repeated measurements. Think repeatability tests or Gage Repeatability and Reproducibility (GR&R) studies.
Type B contributors are estimated based on historical data, calibration certificates, environmental conditions, instrument specifications, and expert judgment. Examples include known calibration errors, temperature variation limits, or software quantization.
Calculating Combined Uncertainty
Combined measurement uncertainty takes both types of contributors into account. Quantify each source of uncertainty, express them in the same units, and use the root-sum-square (RSS) method to determine the combined standard uncertainty.
This provides a single value representing the confidence level in measurement results. We recommend reporting this uncertainty practice for internal process validation, as well as requiring external audits or customer reporting.
Importance in Audits and Compliance
Well-kept records enable teams to demonstrate traceability and process maturity. By documenting contributors to measurement uncertainty and results of regular studies, organizations support both continuous improvement and compliance with industry requirements.

Process Control and Traceability
Beyond the equipment and software, the management of metrology information and processes is vital.
Workflow Documentation and Metadata
Comprehensive documentation forms the backbone of reliable metrology. Each CMM measurement should be supported by standardized records that capture key metadata—such as probe type, stylus configuration, qualification data, software version, temperature, and compensation settings.
Clear responsibility for data entry ensures accountability, while consistent documentation enables repeatability, simplifies audits, and provides traceability. By maintaining this level of detail, teams can quickly link measurement deviations to specific changes in process, equipment, or environment. In turn, this makes routine inspection data into actionable insight for continuous improvement.
Ongoing Training, Change Control, and Process Improvement
Empower measurement teams with continuing training on both the fundamentals of metrology and application-specific knowledge. Use clear, repeatable work instructions for all setups and program changes.
Coordinate with quality assurance teams to establish and audit these procedures. Encourage analysts and operators to participate in periodic reviews of logged data to identify root causes for process drift, build corrective action plans, and adapt work instructions as needed. This dynamic, traceable approach to metrology management supports both daily production and long-term process optimization.
Enhance Accuracy with itpstyli Accessories
You can directly improve your measurement outcomes by integrating itpstyli accessories with your existing CMM. With broad compatibility across common platforms, these components offer a clear path to greater accuracy.
Start each shift by qualifying probes against an itpstyli calibration sphere to ensure a reliable baseline. Select from our inventory of silicon nitride tips for abrasive materials or ruby tips for general-purpose work to reduce wear and re-qualifications. By using our precision fixtures and extensions, you will see immediate improvements in repeatability.
Explore the full range of itpstyli accessories and enhance your quality process today.
At the end of the day, focus on the measurement system as a whole. Addressing the many factors that affect CMM accuracy and precision supports reliable production data.

